Dehydrated Kale Chips

I first had kale chips a few years ago when my mom introduced me to them.  Not knowing what to expect or taste, I hesitantly gave them a try.  I was instantly hooked.  They did not have a heavily “greens” taste at all, which is what I expected.  Instead, they were crispy and salty and “earthy” and amazing.  Then, I discovered these and cue the obsession.  Now, while I love kale chips, I do not like how much they cost.  For some reason, kale chips are crazy expensive.  That is why I finally decided I would start making my own.

Doing some research, I learned that kale chips are usually either made in an oven or in a dehydrator.  Since I did not have a dehydrator, I went with the oven method.  While they turned out alright, they were not exactly what I wanted.   They were a bit too chewy.  And when I would try and bake them more (in order to “dry” them out), the edges would burn.  I tried this a couple of times and finally just gave up.

So then, instead of baking them, I thought I would try dehydrating them in the oven (which is possible according to recipes out there).  Apparently this method is better suited for ovens that can be controlled to maintain a low temperature, which is not possible with my gas oven.  Additionally, you need the oven to run at a very low temperature for a long period of time.  Not only did I know that I could not get the temperature of my oven controlled at a low temperature but I did not like the idea of leaving my gas oven on for 10 plus hours.

It was then, about a month ago, that I started seriously thinking about getting my own dehydrator since I love all sorts of dried fruits and veggies.  I began researching different brands and looking at reviews.  While there are dehydrators that run the gamut of prices, I knew that I wanted the best budget model that I could find.  After lots of research, I decided on the Nesco Snackmaster.  It had really good reviews and was reasonably priced compared to other models.  After purchasing it, I got started dehydrating right away.  While I am still learning about proper drying times, I figure that is part of the learning process so I am just having fun with it.

Regarding the Nesco itself, there is a bit of a humming sound when it is turned on but it does not bother me.  I just leave it in the kitchen or dining room while I am doing other things around the house.  One complaint I found often in reviews was that since it does not have a power switch, it could only be turned off by unplugging it.  But then another commenter suggested plugging it into a power-strip with an “on/off” switch to solve that problem.  Worked great for me.

The first things I made with it…kale chips and apple rings.  The apple rings turned out perfect and delicious.  The kale chips, while good, were not as “dry” as I wanted them to be.  But I think that was because of the temperature I chose.  Each batch I have made since has gotten better and better to the point where I have the right time/temp combo for how I like the chips (hence my decision to share the recipe on the blog).  And since I dehydrate mine at a very low temperature, they are considered “raw” too which is a double bonus since that helps preserve most all of the nutrients.  Now that I have mechanics of the chips correct, I am totally looking forward to trying out new coatings for them.

If you don’t have a dehydrator or if you want to use your oven instead , I highly recommend doing some research on the web because there are lots and lots of recipes and tips for doing it that way (like here, here and here). One warning though…making kale chips is addicting.  I have another batch dehydrating as we speak. :)

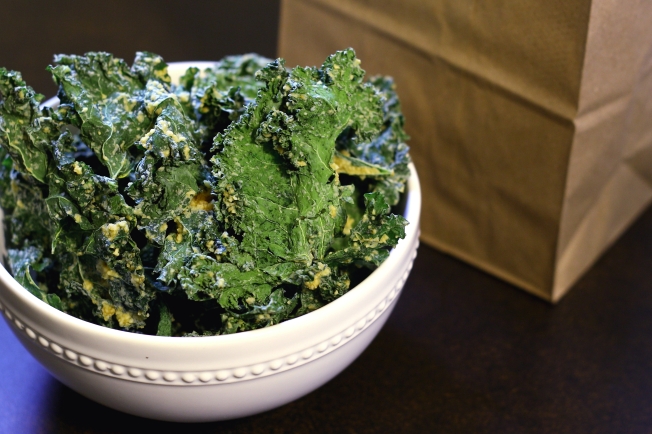
Dehydrated “Cheesy” Kale Chips   (*vegan)

1 bunch of kale (from my experience, when using the dehydrator at least, curly kale works better but for oven recipes, it seems like flat kale (also called lacinto or dinosaur) works best)
1/4 cup of cashews (soaked for over 2 hours)
1/4 cup of nutritional yeast
1/2 tsp coconut oil
1/4 tsp garlic powder
1 TBSP – 1 1/2 TBSP of lemon juice
salt and pepper to taste

1.  Wash your kale and dry it as well as you can.

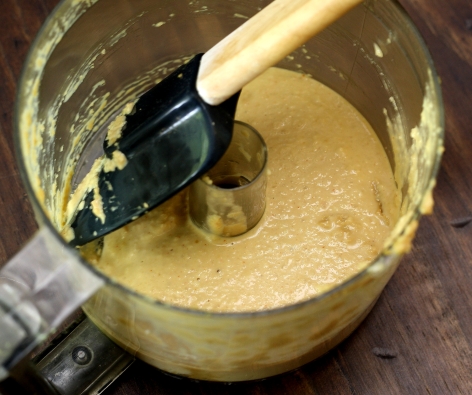
2.  Place all the other ingredients into a food processor or blender and blend until smooth.

3.  Place kale in a bowl (I did mine in two parts).  Add the dressing and massage it into the kale using your hands.  Once all kale is coated, layer the kale out onto the dehydrator sheets.  Do not overcrowd the kale or it will not dry properly.

4.  Dehydrate at 105 degrees for 10-12 hours.

5.  If you don’t end up eating all of the kale right then, store gently in a container that has plenty of space so the kale does not get crushed (for very short term storage, I use brown lunch bags).  Bon apetit!

I am totally on a dehydrator kick now and am excited to try all sorts of things, including other “raw” foods.  Would love to know if you dehydrate using a dehydrator or oven (or other method?) and what you like to dehydrate.  :)

Mascara Love (and Review)

If you were to ask me what was the one make-up item that I think every woman should have or that I could not live without…no question, I would say mascara!!  As cliché as it seems, I would have to agree with the saying that eyes are truly windows to the soul.

Putting on mascara just does something to refine a look.  Whether you are wearing a full face of make-up or none at all, putting mascara on to your lashes adds that final bit of polish.  Quick example: I went to a wedding once and I was so pressed for time doing the make-up of my friends that I was rushing to finish mine.  Later, when I saw pictures of myself, I knew that something was just not right about my look.  Once I realized that I had forgotten to put my mascara on, it became just so clear to me how much mascara serves as a finishing touch to your make-up!  That belief is furthered by the fact that I can tell instantly when one of my non-make-up wearing friends wears mascara!

Mascara just does something to refine your look.  It opens up your eyes and brings attention and drama to them, simply makes them the focus.

Being the professed mascara lover that I am, it would be fair to say that I have tried my share of different mascaras.  I am always on the lookout for one which provides the perfect combination of length and volume.   After years of trying different brands and formulations, what is my number one choice?  Lancome Définicils.

If you want mile long lashes, use this stuff!  The mascara glides onto your lashes, is smooth and doesn’t get clumpy (unless you keep re-coating your lashes).  The mascara wand is also nice because it is skinny and the bristles are short so you are able to bring the wand really close to your lash line without fear of poking yourself in the eye.  I find that two coats make my lashes look super long.

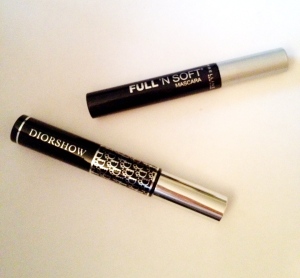
Coming in a close second:  a two-way tie between Christian Dior DiorShow and Maybelline Full ‘n Soft.

These both will give you really nice volume.  Most of the time, I use the Définicils and then I do a second coat with either the DiorShow or the Full ‘n Soft.  They both go on very smoothly.  And they both have thicker wands with longer and fuller bristles which I am sure is what helps with the volume.  Some days, if I am going for a fuller lash look, I will not use the Définicils and just use one of these (with two coats of course).   Both of these will really make it look like you have more lashes than you actually do.

Case in point:


In the picture with mascara, I used one coat of Définicils (in Black) and then one coat of Full ‘n Soft (in Very Black) on my top lashes and then only one coat of Full ‘n Soft on the bottom (and a very light coat at that).

The fact that I have found these three favorite mascaras does not mean that I am going to stop testing  others.  While all three of these are awesome, I would not say that any of them are 100% of what I want in a mascara.  So while the hunt for the “perfect” mascara endures, I will continue to use these three mascaras  regularly because they are definitely the cream of the crop for me.  Of course, if in my quest, I find one that I deem better, then I will most definitely share.

Would love to hear from you regarding your favorite mascara.  I love recommendations.

Review: Sephora Smoky Kohl Eyeliner

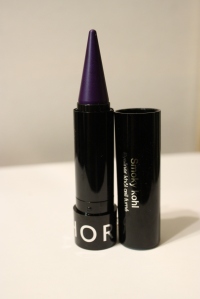
So I went out today and purchased the Smoky Kohl Eyeliner from Sephora.

As I am always on the hunt for a good purple eyeliner, I decided to go with the purple shade.  The result:

On my eye, I thought the color was really pretty but it required numerous applications in order for me to get the color as dark as I wanted.  It went on very smoothly and easily but the color was not highly pigmented (now I can only comment on the purple shade because that is the one I tried).  I would recommend this to someone who does not wear much eyeliner or does not like to have a very noticeable color line.  This would be great for a day look  or a good choice if you are going to go for a more bold lip.  For me, personally, I prefer a more pigmented color so while I am still on the hunt for the perfect purple eyeliner pencil, I would definitely wear this eyeliner again on a day that I wanted a softer purple look. Because I generally prefer higher pigmented eyeliners, I love Sephora brand’s Flashy Waterproof Liner and their Jumbo Eyeliner pencils.  The Flashy eyeliners go on very smoothly and easily but are also highly pigmented.  I am wearing “Flashy Blue” in the picture below.

Using Sephora Flashy Liner in Flashy Blue.

While the Jumbo Eyeliners don’t go on quite as smoothly as either the Smoky Kohl Liner or the Flashy Liners, they still do go on pretty smoothly and definitely have a  nice amount of color.  Below, I am wearing the Jumbo eyeliner (an old version) in “019,” a lavender color.

Sephora Jumbo eyeliner in 019.

While the lavender color the of Jumbo eyeliner is not crazy bright, other colors like a blue shade called “509” and a green shade called “510” are very pigmented and are two of my personal favorites.

Sephora Jumbo liners in 509 and 510.

Overall, I was pretty happy with the Smoky Kohl eyeliner.  While I don’t think it will be my everyday liner, I will use it on days that I don’t want a strong eye look.   I definitely recommend it to people that are new to using eyeliner or don’t like a strong liner look.

Lip-Stain

I used to say that mascara was the one make-up product that I could not live without out…now I may have to change that to lip-stain.

Not necessary lipstick, but lip-stain. One thing I have never liked much about lipstick is how easily it wipes off.  I started wearing bright colored lip-stains in the spring after my curiosity got the best of me and now I can’t seem to stop. I like how they are long-lasting and boldly colored but don’t feel like a thick coating over my lips (and don’t immediately smear or rub off when I drink something).

I started with these, by Tarte.  They are the Tarte Matte Lip Tints.

And so the love affair with lip stain (or lip tint) started. Their lip-stains are bold-colored and pretty long-lasting and they feel good on your lips. Additionally, you feel good using Tarte brand cosmetics because they are made of healthy and all natural ingredients. I actually learned about Tarte when I got an eyeshadow palette as a gift.   The shadows are nicely pigmented and long-lasting.  Then I moved onto their other products such as eye liners, blushes and, of course, their lip tints.  I highly recommend all of their products!  Perhaps one day, I will post a make up tutorial using the Tarte products that I currently own.

Fast forward a month or two, I was at the drug store and I was perusing the makeup aisles, as I seem to always do even when I am running in for non-makeup purchases, and the Revlon Just Bitten lip-stain display caught my eye.  I remember reading some good reviews of the product online when I was researching it and since it was on sale, I grabbed two different colors and thought I would just try them out.

Well, let’s just say I now have many, many different shades of this product.   They have a more liquid-like application as compared to the Tarte lip tints but they are super long-lasting as well as highly-pigmented and very bold-colored.  I adore them.  At any moment, my bathroom and purses are filled with an assortment of colors of either the Tarte of Revlon lip-stains/lip tints.  I have even bought doubles of some of my favorite colors just so I can keep one  of the two in my purse at all times!

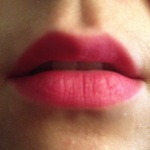
In my many attempts to get close-ups of my lips which were in focus and as natural a color as possible, this was the only one which was semi successful.

Wearing Tarte Matte Lip Tint in Lively

Yay for boldly colorful lips!  And now I must say, this quote has even more meaning to me now:  “Beauty, to me, is about being comfortable in your own skin. That, or a kick-ass red lipstick.”  ~Gwyneth Paltrow.  (or lip-stain in my case  :) )